Mapping to a Shared Network Drive
If you use any network drives to access shared files below are dropdown fields with
how-to documents giving Mac and Windows users step-by-step instructions on mapping
to a shared network drive.
NOTE: If you are working remotely, before trying to map the network drives, make sure
that you are signed into the VPN.
- From your Mac Desktop proceed to the ‘Go’ option and select ‘Connect to Server’:

- Connect to requested shared drive by typing your Server Address.
smb://ServerName/[Shared Drive Path]
*Optional: Select the [+] at the bottom left to add requested shared drive as a favorite server connection.
- Confirm the drive you are attempting to connect to by selecting 'Connect'.

- Enter your UA credentials. Note: Adding '@UA' to the end of your username is required for computers that have
migrated to Kandji.

- If you did not specify the folder when entering your Server Name, select it here.

- Open the File Explorer icon from the Taskbar:

On the left column select This PC:
Select Computer, and then select Map network drive.
- Select an available letter in the Drive: selection box. Next, type the shared drive path in the Folder: text box. Check Reconnect at Sign In, and select the Finish button.

- Open the File Explorer icon from the Taskbar:
 On the left column select This PC:
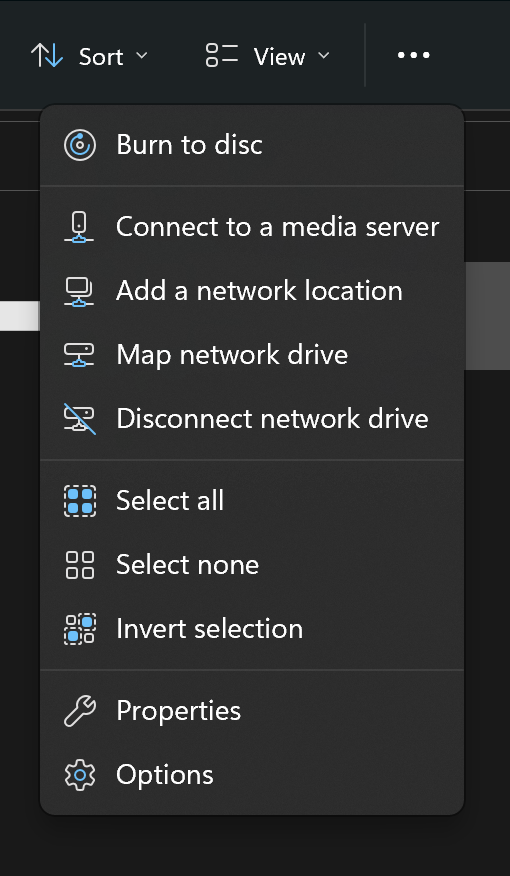
Select the three dots, and then select Map network drive.

- Select an available letter in the Drive: selection box. Next, type the shared drive path in the Folder: text box. Check Reconnect at Sign in, and select Finish button.


